A Brief History of Spring’s Data Integration Journey
Spring’s journey on Data Integration started with Spring Integration. With its programming model, it provided a consistent developer experience to build applications that can embrace Enterprise Integration Patterns to connect with external systems such as, databases, message brokers, and among others.
Fast forward to the cloud-era, where microservices have become prominent in the enterprise setting. Spring Boot transformed the way how developers built Applications. With Spring’s programming model and the runtime responsibilities handled by Spring Boot, it became seamless to develop stand-alone, production-grade Spring-based microservices.
To extend this to Data Integration workloads, Spring Integration and Spring Boot were put together into a new project. Spring Cloud Stream was born.
With Spring Cloud Stream, developers can:
* Build, test, iterate, and deploy data-centric applications in isolation.
* Apply modern microservices architecture patterns, including composition through messaging.
* Decouple application responsibilities with event-centric thinking. An event can represent something that has happened in time, to which the downstream consumer applications can react without knowing where it originated or the producer’s identity.
* Port the business logic onto message brokers (such as RabbitMQ, Apache Kafka, Amazon Kinesis).
* Interoperate between channel-based and non-channel-based application binding scenarios to support stateless and stateful computations by using Project Reactor’s Flux and Kafka Streams APIs.
* Rely on the framework’s automatic content-type support for common use-cases. Extending to different data conversion types is possible.
Quick Start
You can try Spring Cloud Stream in less then 5 min even before you jump into any details by following this three-step guide.
We show you how to create a Spring Cloud Stream application that receives messages coming from the messaging middleware of your choice (more on this later) and logs received messages to the console.
We call it LoggingConsumer.
While not very practical, it provides a good introduction to some of the main concepts
and abstractions, making it easier to digest the rest of this user guide.
The three steps are as follows:
Creating a Sample Application by Using Spring Initializr
To get started, visit the Spring Initializr. From there, you can generate our LoggingConsumer application. To do so:
-
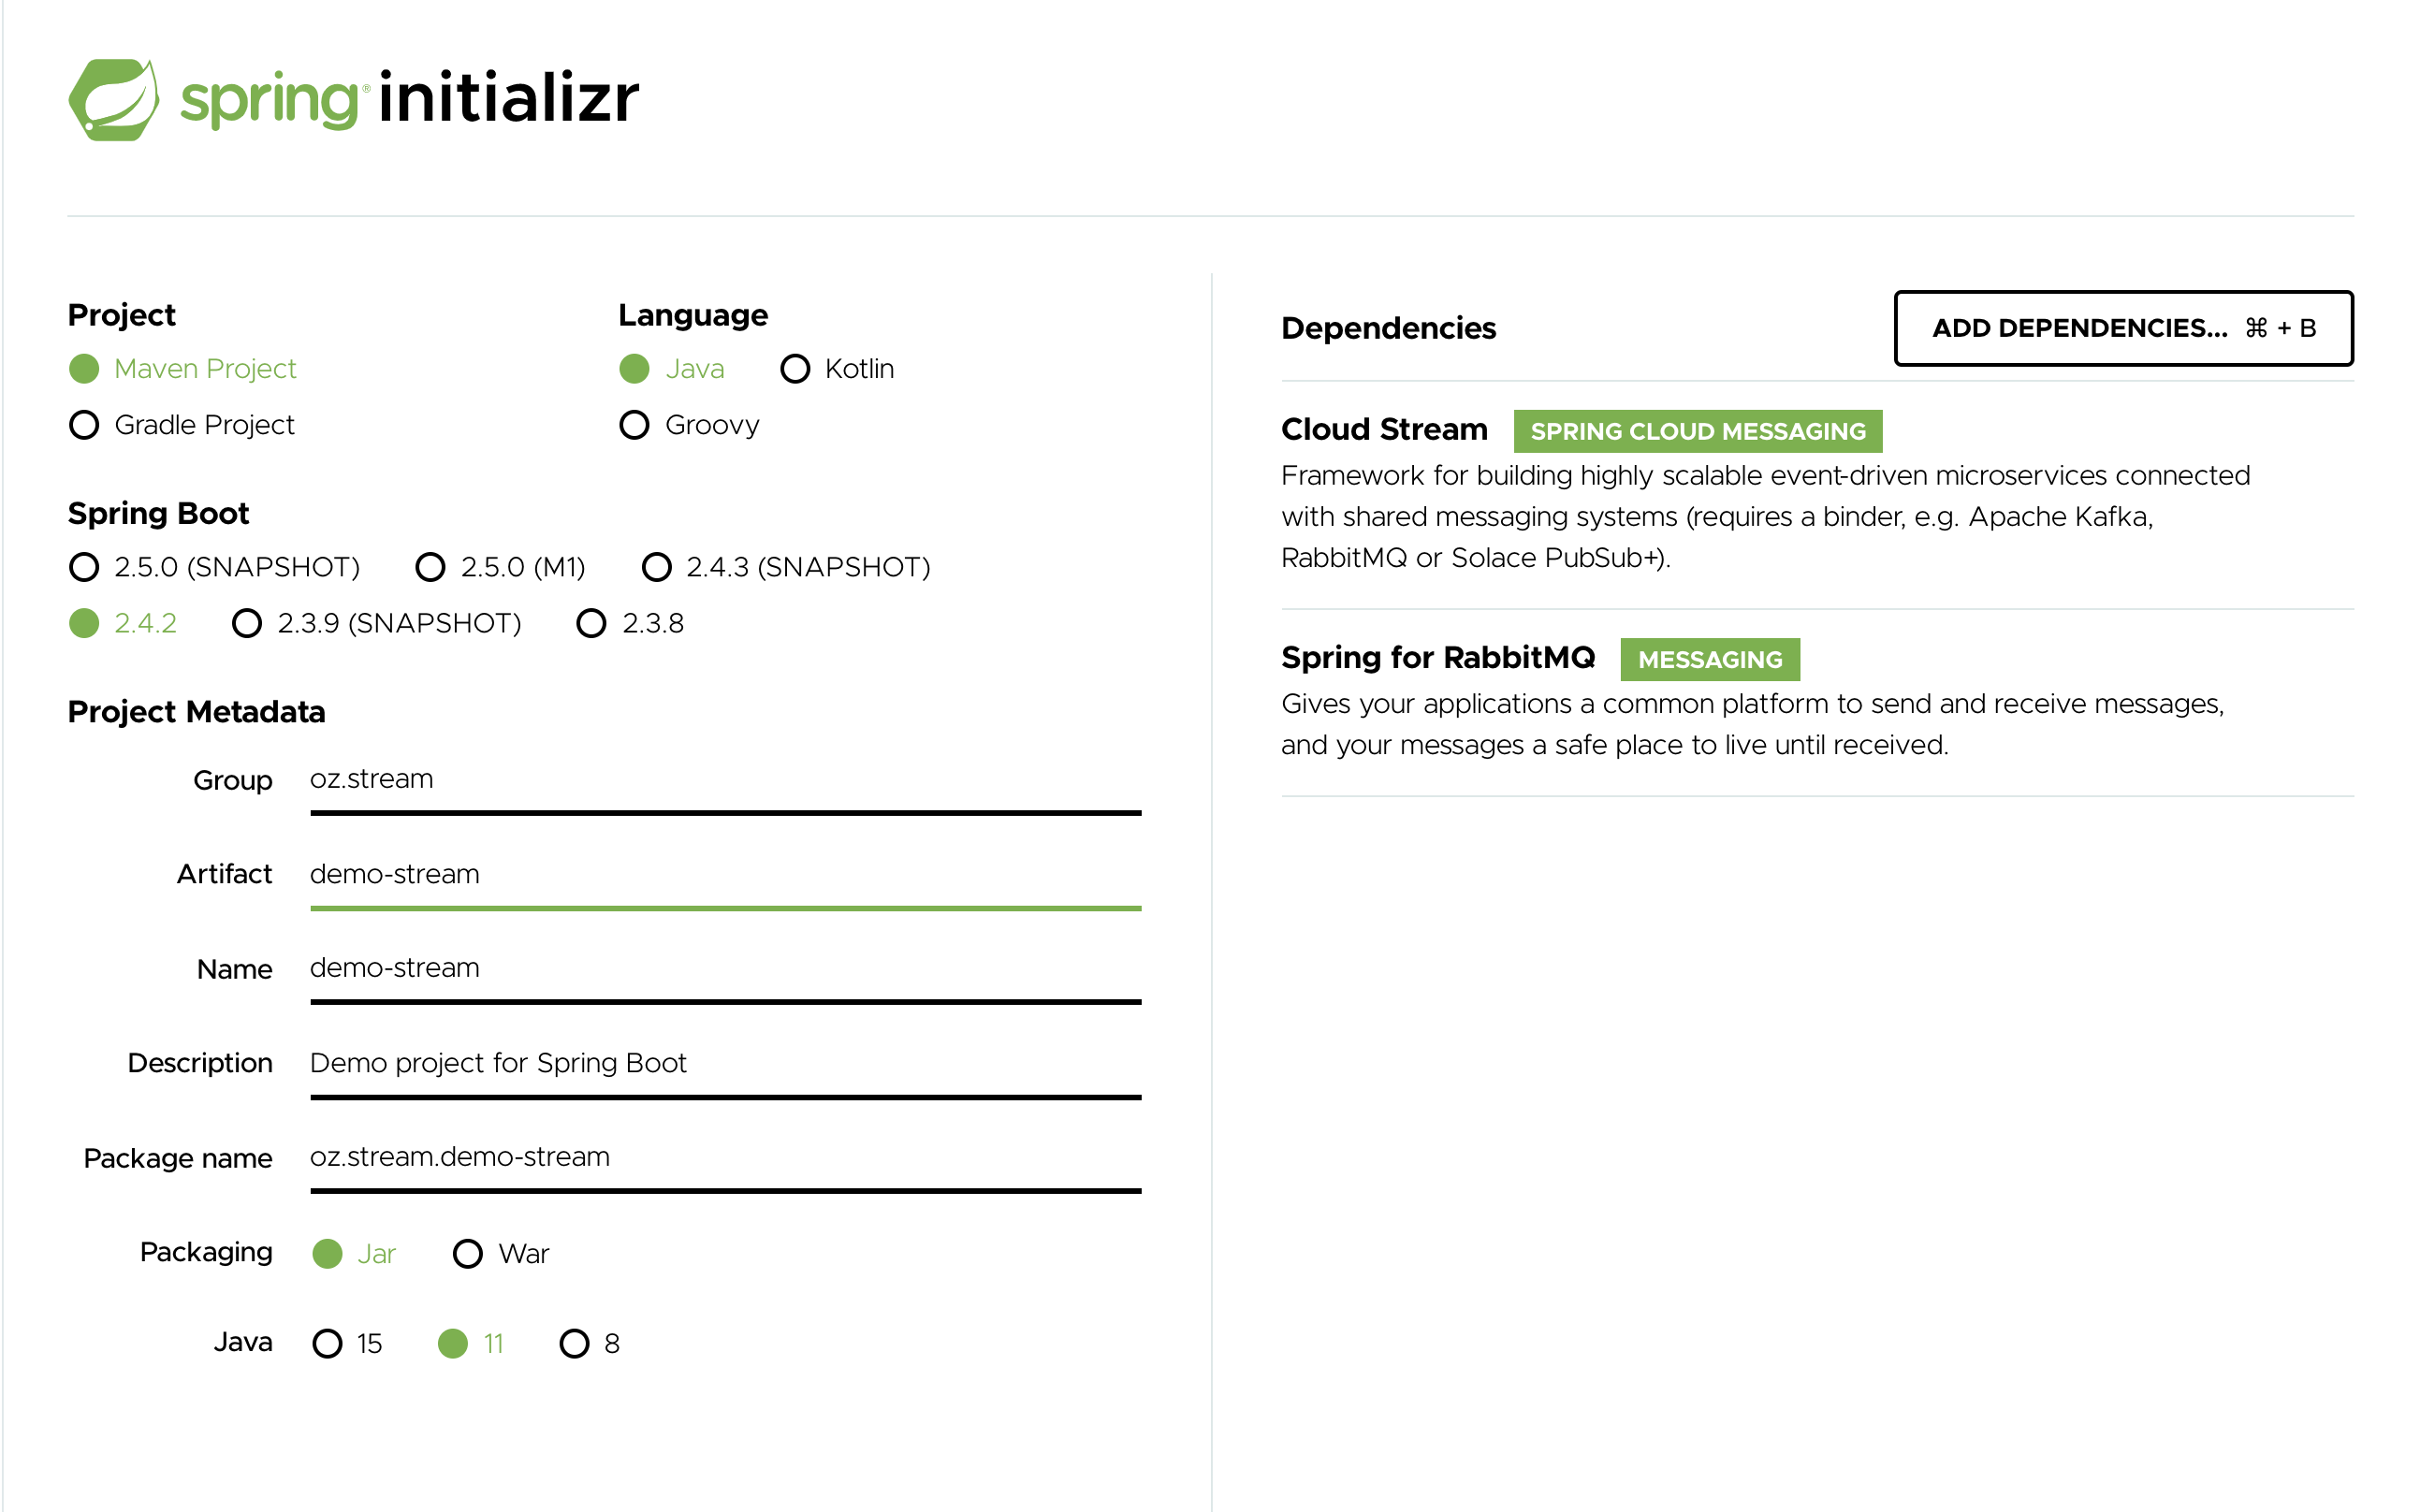
In the Dependencies section, start typing
stream. When the “Cloud Stream” option should appears, select it. -
Start typing either 'kafka' or 'rabbit'.
-
Select “Kafka” or “RabbitMQ”.
Basically, you choose the messaging middleware to which your application binds. We recommend using the one you have already installed or feel more comfortable with installing and running. Also, as you can see from the Initilaizer screen, there are a few other options you can choose. For example, you can choose Gradle as your build tool instead of Maven (the default).
-
In the Artifact field, type 'logging-consumer'.
The value of the Artifact field becomes the application name. If you chose RabbitMQ for the middleware, your Spring Initializr should now be as follows:
-
Click the Generate Project button.
Doing so downloads the zipped version of the generated project to your hard drive.
-
Unzip the file into the folder you want to use as your project directory.
| We encourage you to explore the many possibilities available in the Spring Initializr. It lets you create many different kinds of Spring applications. |
Importing the Project into Your IDE
Now you can import the project into your IDE. Keep in mind that, depending on the IDE, you may need to follow a specific import procedure. For example, depending on how the project was generated (Maven or Gradle), you may need to follow specific import procedure (for example, in Eclipse or STS, you need to use File → Import → Maven → Existing Maven Project).
Once imported, the project must have no errors of any kind. Also, src/main/java should contain com.example.loggingconsumer.LoggingConsumerApplication.
Technically, at this point, you can run the application’s main class. It is already a valid Spring Boot application. However, it does not do anything, so we want to add some code.
Adding a Message Handler, Building, and Running
Modify the com.example.loggingconsumer.LoggingConsumerApplication class to look as follows:
@SpringBootApplication
@EnableBinding(Sink.class)
public class LoggingConsumerApplication {

	public static void main(String[] args) {
		SpringApplication.run(LoggingConsumerApplication.class, args);
	}

	@StreamListener(Sink.INPUT)
	public void handle(Person person) {
		System.out.println("Received: " + person);
	}

	public static class Person {
		private String name;
		public String getName() {
			return name;
		}
		public void setName(String name) {
			this.name = name;
		}
		public String toString() {
			return this.name;
		}
	}
}
As you can see from the preceding listing:
-
We have enabled
Sinkbinding (input-no-output) by using@EnableBinding(Sink.class). Doing so signals to the framework to initiate binding to the messaging middleware, where it automatically creates the destination (that is, queue, topic, and others) that are bound to theSink.INPUTchannel. -
We have added a
handlermethod to receive incoming messages of typePerson. Doing so lets you see one of the core features of the framework: It tries to automatically convert incoming message payloads to typePerson.
You now have a fully functional Spring Cloud Stream application that does listens for messages.
From here, for simplicity, we assume you selected RabbitMQ in step one.
Assuming you have RabbitMQ installed and running, you can start the application by running its main method in your IDE.
You should see following output:
	--- [ main] c.s.b.r.p.RabbitExchangeQueueProvisioner : declaring queue for inbound: input.anonymous.CbMIwdkJSBO1ZoPDOtHtCg, bound to: input
	--- [ main] o.s.a.r.c.CachingConnectionFactory       : Attempting to connect to: [localhost:5672]
	--- [ main] o.s.a.r.c.CachingConnectionFactory       : Created new connection: rabbitConnectionFactory#2a3a299:0/SimpleConnection@66c83fc8. . .
	. . .
	--- [ main] o.s.i.a.i.AmqpInboundChannelAdapter      : started inbound.input.anonymous.CbMIwdkJSBO1ZoPDOtHtCg
	. . .
	--- [ main] c.e.l.LoggingConsumerApplication         : Started LoggingConsumerApplication in 2.531 seconds (JVM running for 2.897)
Go to the RabbitMQ management console or any other RabbitMQ client and send a message to input.anonymous.CbMIwdkJSBO1ZoPDOtHtCg.
The anonymous.CbMIwdkJSBO1ZoPDOtHtCg part represents the group name and is generated, so it is bound to be different in your environment.
For something more predictable, you can use an explicit group name by setting spring.cloud.stream.bindings.input.group=hello (or whatever name you like).
The contents of the message should be a JSON representation of the Person class, as follows:
{"name":"Sam Spade"}
Then, in your console, you should see:
Received: Sam Spade
You can also build and package your application into a boot jar (by using ./mvnw clean install) and run the built JAR by using the java -jar command.
Now you have a working (albeit very basic) Spring Cloud Stream application.
What’s New in 2.2?
Spring Cloud Stream introduces a number of new features, enhancements, and changes in addition to the once already introduced in version 2.0
The following sections outline the most notable ones:
Notable Deprecations
As of version 2.2, the following items have been deprecated:
-
The spring-cloud-stream-reactive module is deprecated in favor of native support via Spring Cloud Function programming model.
Notes on migrating from 1.x to 2.x?
-
Due to the improvements in content-type negotiation, the
originalContentTypeheader is not used (ignored) since 2.x and only exists for maintaining compatibility with 1.x versions -
Introduction of
@StreamRetryTemplatequalifier. While configuring custom instance of theRetryTemplateand to avoid conflicts you must qualify the instance of suchRetryTemplatewith this qualifier. See Retry Template for more details.